Animal Physiology
- - May 05, 2022
The ATC2000 is a low noise heating system for maintaining animal body temperature during experimental procedures. It has three modes of operation, which we discuss here.
Normal mode compares the temperature and the setpoint for PID control. Adaptive mode is ingenious. It uses the monitored animal temperature and the actual plate temperature to define an offset value which is used to adjust the PID parameters. That offset is recalculated at a set interval for extremely precise control. Shutdown mode is a fail safe that shuts the unit down if the plate temperature reaches a defined setpoint (like 45ºC) that would endanger the animal.
The instrument has three modes of operation:
- Normal
- Adaptive
- Shutdown
Normal Mode
The normal mode compares the temperature of the configured sensor (RTD or TC) with the set point to control the heater.
Adaptive Mode
In the adaptive mode, the sensor in the heated plate is used as the control trigger for the set point. A platinum sensor in the plate monitors...more
- - May 03, 2022
The ATC2000 is a low noise heating system for maintaining animal body temperature during experimental procedures. Here we show you how to reset the factory defaults on your ATC2000.
To reset all the configuration parameters to the factory defaults:
- Turn the unit off.
- Then, hold down both the Up and Down buttons while you turn the unit on again.
All customized paramaters will be set to the original factory default settings.
If you have any questions, just give us a call.
- - May 01, 2022
The ATC2000 is a low noise heating system for maintaining animal body temperature during expiremental procedures.
Here are some common issues you may encounter:
- No power. If you have no power, you may have a poor connection. Check the power cable connection.
- ERROR displays instead of a temperature. If ERROR displays instead of a temperature on the main display, you may have a poor probe connection. Disconnect the probe and properly re-connect it to the ATC2000.
- Animal cannot reach set temperature. If the animal cannot reach the set temperature, you may have insufficient heating power. The maximum power output on the heating device is 30W. In most situations the power is sufficient to keep the animal warm up to 40˚ C. To minimize heating loss, insulate the bottom of heating plate and cover the animal with a small blanket to keep it warm.
- Alarm is sounding. If an alarm is sounding, you may have poor transfer of heat from the heating plate to the animal. (The plate is hot, but the animal...more
- - April 28, 2022
The ATC-2000 is a low noise heating system for maintaining animal body temperature during experimental procedures. The ATC-2000 uses a digital PID controller to regulate the application of power to the heating plate to achieve the desired temperature at the monitored sensor. PID stands for Proportional, Integral and Differential. If the factory default PID settings do not adequately stabilize the system, you can manually adjust the PID parameters. WPI doesn't reccomend changing these parameters manually unless you are familiar with the functions of each PID parameter.
Setting PID Parameters
- Press the PID button to display the PID screen. The two arrows on the screen indicate which digit is being adjusted.
2. Press the Config button to select the P line to modify the proportional value, I line to modify the integral value or the D line to modify the differential value.
3. Press the PID button to select the digit to modify. Each time you press the PID button, the top arrow moves...more - - April 26, 2022
ATC2000 is a low noise heating system for maintaining animal body temperature during experimental procedures. Here we will look at how to adjust the basic configuration parameters. From the configuration menu, you can:
- Adjust the set point temperature
- Set the high and low alarm limits
- Enable/disable the audible alarm
- Adjust the three temperature offsets
- Enable adaptive mode and setup the adaptive interval
- Change the shutdown temperature setpoint
You can use the same procedure to adjust any ATC2000 configuration parameter, regardless of which parameter you’re adjusting.
- Press the Config button to access the Configuration menu. Press the Config button again to toggle to the parameter you want to adjust.
- Then use the Up or Down button to make an adjustment.
- Press the Display button to save the parameter.
Temperature Setpoint
You may adjuSetting Low Alarm Limit
Likewise, you may set the Low Alarm Limit. If the controlled temperature falls below the low alarm temperature...more - - April 24, 2022
ATC2000 is a low noise heating system for maintaining animal body temperature during experimental procedures. The ATC2000 has three temperature sensors. One is located in the heated plate, and the other two can be plugged into the RTD and TC input ports. The ATC2000monitors all three temperature readings. You can choose which of the three the unit will control. The ATC2000 then heats (or stops heating) the plate to keep the controlled temperature within the alarm limits.
- To set the controlled temperature, press the SRC button.
- Press the Up or Down key to select a temperature source.
NOTE: If the unit is placed in adaptive mode, then the heater plate is not available as a temperature source option here. - To make the selected temperature source the default temperature source, press the SRC button again. A *D* appears on the display next to your choice to indicate that it is the default temperature source. The unit will retain the default setting even after you power off the ATC2000...more
- To set the controlled temperature, press the SRC button.
- - April 21, 2022
ATC2000 is a low noise heating system for maintaining animal body temperature during experimental procedures. The temperature controller provides electrically quiet control over the heating plate, so that you can place the animal directly onto the heating plate. Here’s how to set up the system.
- Connect the heating plate to the Plate connector. Line up the pins, press it into place and screw it in place finger tight.
- Connect the rectal temperature probe to one of the Inputs on the ATC 2000. If it is an RTD temperature sensor, plug it into the RTD port. If it is a thermocouple sensor, plug it into the TC port.
- Assemble the power supply and the cord, and plug the power supply into the back of the ATC2000.
- Turn on the ATC2000 using the power switch on the back of the unit.
- Adjust the set point, if necessary.
- The unit always powers up in Normal mode with the heat source set as default heat source from the previous use. Typically, the plate temperature is the control value used until it...more
- - April 19, 2022
ATC2000 is a low noise heating system for maintaining animal body temperature during experimental procedures. Here we will look at the main display on the front panel to see what information is available and the three operational modes.
The main display window shows the set point and the mode of operation on the left side of the screen. On the right side, the control temperature and plate temperature are visible. The arrow next to the TC Probe indicates that the TC Probe is the controlled temperature.
TEMPERATURE DISPLAY
In this illustration, the unit is controlling the thermocouple (TC) probe. In this case, the RTD probe temperature can be viewed by pressing the Display button. When the unit controls the RTD probe, that temperature displays on this screen. The OK next to a temperature indicates that the temperature falls within the parameters defined by the low and high alarm limits. If the temperature falls below the low limit, LO displays instead of OK. Likewise, if it exceeds the high...more
- - April 17, 2022
The ATC 2000 is a low noise heating system for maintaining animal body temperature during experimental procedures. Here are five reasons to choose the WPI Animal Temperature Controller. WPI's Adaptive control is unique in the industry, giving you precision control without the need for complex programming when it counts. Simple to setup. Stable control. No local hotspots.
1. ELECTRICALLY QUIET:
The DC heater is extremely quiet in terms of electromagnetic radiation. This is essential in electrophysiological recordings which are very sensitive to electromagnetic interference.
2. PRECISE & STABLE CONTROL:The controller uses proportional, integral, and differential (PID) technology in adjusting the DC voltage output. Compared with switched on/off type controllers, PID controllers provide a much more precise and stable control of temperature. The PID approach is also more immune to the variation of the experimental conditions such as change in animal size and unexpected disturbances...more
- - February 03, 2022
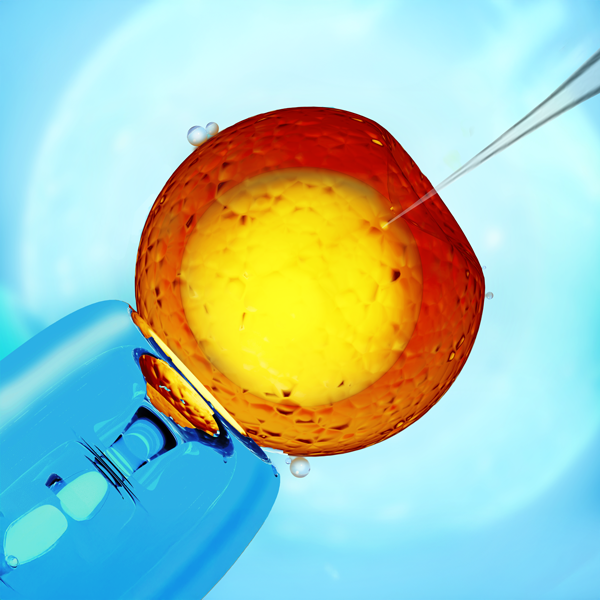
Overview of the MICRO-ePUMP
Designed to simplify intracellular injection and a variety of other microinjection tasks, the MICRO-ePUMP uses carefully regulated air pressure for injecting cells with fluid. Injected volumes range from picoliters to nanoliters. Timing, injection pressure and compensation pressure are adjusted independently using the touch screen interface. Time intervals can range from 2 seconds down to 10 ms or less, depending on the injection pressure setting. The injection pressure interval is triggered using the foot switch.
The MICRO-ePUMP is designed to inject very small quantities of fluids, such as drugs, into cells or small organelles. Two different positive pressures may be applied with a precision timing circuit that switches between the two pressure automatically.
- The port supplies positive pressure for high-pressure ejection.
- The pressure port maintains a low positive “compensation” pressure to the injecting pipette between injection pulses to prevent fluid uptake...more
- - July 15, 2018
This 900A video series of 6 videos is designed to help familiarize you with the basic operation of the 900A Micropressure System. The 900A was designed for measuring pressures in kidney tubules, and it has many applications. It has recently been used for measuring ventricular blood pressure in larval fish. We suggest that you become familiar with the information in the instruction manual and the parts and techniques you need to operate the system effectively. Please read the manual and watch these videos prior to setting up and testing your 900A Micropressure System. Instrument Description
- The 900A Micropressure System is designed to measure pressures from –200 to +400 mmHg in small blood vessels, cells and other electrolyte-filled micro-cavities.
- The main components are the 900A include the Control Unit, the Pressure Pod and a Probe that connects to a glass microelectrode.
- The 900A utilizes an ion gradient at the tip of the microelectrode to set a null value of resistance in a...more
- - April 30, 2014
The 900A is designed to measure hydrostatic pressure in small vessels and cells. Pressure ranges of -200 to +400 millimeters of mercury can be measured with stability and accuracy. The system's sensing element is an electrolyte-filled glass microelectrode with a tip diameter range of 2 to 5 microns. Pressures of electrolyte solutions are measured by maintaining a salt concentration gradient at the tip of the sensing electrode in dynamic equilibrium by applying an equal air pressure inside the microelectrode. The pressure reading appears on the front panel display and via the BNC recorder output. Because the piezo electric pressure controller uses external pressure and vacuum sources, pressures lower than -200 to greater than +400 mm Hg can be quickly and accurately measured at the microelectrode tip.
Now, you can see how to setup your 900A Micropressure system.
Watch how to regulate the pressure and the vacuum for your 900A using a PM015 pressure manometer.
If you...more
Recent Posts