Page 2 - TechTalk Videos
- - May 03, 2022
The ATC2000 is a low noise heating system for maintaining animal body temperature during experimental procedures. Here we show you how to reset the factory defaults on your ATC2000.
To reset all the configuration parameters to the factory defaults:
- Turn the unit off.
- Then, hold down both the Up and Down buttons while you turn the unit on again.
All customized paramaters will be set to the original factory default settings.
If you have any questions, just give us a call.
- - May 01, 2022
The ATC2000 is a low noise heating system for maintaining animal body temperature during expiremental procedures.
Here are some common issues you may encounter:
- No power. If you have no power, you may have a poor connection. Check the power cable connection.
- ERROR displays instead of a temperature. If ERROR displays instead of a temperature on the main display, you may have a poor probe connection. Disconnect the probe and properly re-connect it to the ATC2000.
- Animal cannot reach set temperature. If the animal cannot reach the set temperature, you may have insufficient heating power. The maximum power output on the heating device is 30W. In most situations the power is sufficient to keep the animal warm up to 40˚ C. To minimize heating loss, insulate the bottom of heating plate and cover the animal with a small blanket to keep it warm.
- Alarm is sounding. If an alarm is sounding, you may have poor transfer of heat from the heating plate to the animal. (The plate is hot, but the animal...more
- - April 28, 2022
The ATC-2000 is a low noise heating system for maintaining animal body temperature during experimental procedures. The ATC-2000 uses a digital PID controller to regulate the application of power to the heating plate to achieve the desired temperature at the monitored sensor. PID stands for Proportional, Integral and Differential. If the factory default PID settings do not adequately stabilize the system, you can manually adjust the PID parameters. WPI doesn't reccomend changing these parameters manually unless you are familiar with the functions of each PID parameter.
Setting PID Parameters
- Press the PID button to display the PID screen. The two arrows on the screen indicate which digit is being adjusted.
2. Press the Config button to select the P line to modify the proportional value, I line to modify the integral value or the D line to modify the differential value.
3. Press the PID button to select the digit to modify. Each time you press the PID button, the top arrow moves...more - - April 27, 2022
The ATC2000 is a low noise heating system for maintaining animal body temperature during experimental procedures. The ATC2000 uses a digital PID controller to regulate the application of power to the heating plate to achieve the desired temperature at the monitored sensor. PID stands for Proportional, Integral and Differential. Here’s how PID control works:
The default set point is 37°C, but you can configure it. The controller calculates the error, which is the difference between the present temperature and the desired temperature.
Error = Monitored temperature – Set point
Three individual components are derived by applying different functions to the error.
The default set point is 37°C, but you can configure it. The controller calculates the error, which is the difference between the present temperature and the desired temperature.
Error = Monitored temperature – Set point
Three individual components are derived by applying different functions to the
- The error is multiplied by the proportional...more
- - April 26, 2022
ATC2000 is a low noise heating system for maintaining animal body temperature during experimental procedures. Here we will look at how to adjust the basic configuration parameters. From the configuration menu, you can:
- Adjust the set point temperature
- Set the high and low alarm limits
- Enable/disable the audible alarm
- Adjust the three temperature offsets
- Enable adaptive mode and setup the adaptive interval
- Change the shutdown temperature setpoint
You can use the same procedure to adjust any ATC2000 configuration parameter, regardless of which parameter you’re adjusting.
- Press the Config button to access the Configuration menu. Press the Config button again to toggle to the parameter you want to adjust.
- Then use the Up or Down button to make an adjustment.
- Press the Display button to save the parameter.
Temperature Setpoint
You may adjuSetting Low Alarm Limit
Likewise, you may set the Low Alarm Limit. If the controlled temperature falls below the low alarm temperature...more - - April 24, 2022
ATC2000 is a low noise heating system for maintaining animal body temperature during experimental procedures. The ATC2000 has three temperature sensors. One is located in the heated plate, and the other two can be plugged into the RTD and TC input ports. The ATC2000monitors all three temperature readings. You can choose which of the three the unit will control. The ATC2000 then heats (or stops heating) the plate to keep the controlled temperature within the alarm limits.
- To set the controlled temperature, press the SRC button.
- Press the Up or Down key to select a temperature source.
NOTE: If the unit is placed in adaptive mode, then the heater plate is not available as a temperature source option here. - To make the selected temperature source the default temperature source, press the SRC button again. A *D* appears on the display next to your choice to indicate that it is the default temperature source. The unit will retain the default setting even after you power off the ATC2000...more
- To set the controlled temperature, press the SRC button.
- - April 21, 2022
ATC2000 is a low noise heating system for maintaining animal body temperature during experimental procedures. The temperature controller provides electrically quiet control over the heating plate, so that you can place the animal directly onto the heating plate. Here’s how to set up the system.
- Connect the heating plate to the Plate connector. Line up the pins, press it into place and screw it in place finger tight.
- Connect the rectal temperature probe to one of the Inputs on the ATC 2000. If it is an RTD temperature sensor, plug it into the RTD port. If it is a thermocouple sensor, plug it into the TC port.
- Assemble the power supply and the cord, and plug the power supply into the back of the ATC2000.
- Turn on the ATC2000 using the power switch on the back of the unit.
- Adjust the set point, if necessary.
- The unit always powers up in Normal mode with the heat source set as default heat source from the previous use. Typically, the plate temperature is the control value used until it...more
- - April 19, 2022
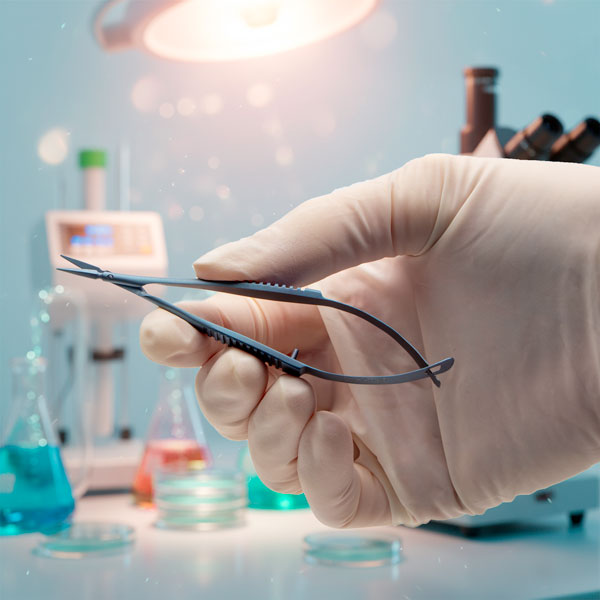
Needle holders, also known as a needle drivers. They are used in wound closure, ligation, reanastomosis and other surgical procedures which require suturing. The needle is usually held in position by a clamp mechanism, which allows the operator to manipulate the needle through various tissues. The jaws are generally textured and short in comparison to the shank to retain a solid grasp on the needle.
- - April 19, 2022
ATC2000 is a low noise heating system for maintaining animal body temperature during experimental procedures. Here we will look at the main display on the front panel to see what information is available and the three operational modes.
The main display window shows the set point and the mode of operation on the left side of the screen. On the right side, the control temperature and plate temperature are visible. The arrow next to the TC Probe indicates that the TC Probe is the controlled temperature.
TEMPERATURE DISPLAY
In this illustration, the unit is controlling the thermocouple (TC) probe. In this case, the RTD probe temperature can be viewed by pressing the Display button. When the unit controls the RTD probe, that temperature displays on this screen. The OK next to a temperature indicates that the temperature falls within the parameters defined by the low and high alarm limits. If the temperature falls below the low limit, LO displays instead of OK. Likewise, if it exceeds the high...more
- - April 17, 2022
The ATC 2000 is a low noise heating system for maintaining animal body temperature during experimental procedures. Here are five reasons to choose the WPI Animal Temperature Controller. WPI's Adaptive control is unique in the industry, giving you precision control without the need for complex programming when it counts. Simple to setup. Stable control. No local hotspots.
1. ELECTRICALLY QUIET:
The DC heater is extremely quiet in terms of electromagnetic radiation. This is essential in electrophysiological recordings which are very sensitive to electromagnetic interference.
2. PRECISE & STABLE CONTROL:The controller uses proportional, integral, and differential (PID) technology in adjusting the DC voltage output. Compared with switched on/off type controllers, PID controllers provide a much more precise and stable control of temperature. The PID approach is also more immune to the variation of the experimental conditions such as change in animal size and unexpected disturbances...more
- - February 14, 2022
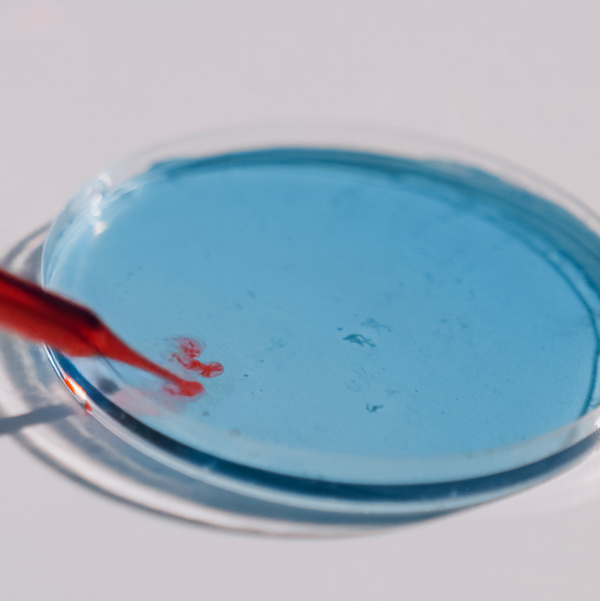
Ultrasonic cleaning is the most effective cleaning method for maintaining your surgical instruments, because of its cavitation. Vibrating sound waves create micron-size bubbles in solution that grow as the pressure in the unit changes. Eventually the bubbles implode. The bursting bubbles effectively dislodge debris, even in the most difficult to reach places. Use of ultrasonic detergent greatly improves the effectiveness of the cleaner, because it increases the number of tiny bubbles
- Immediately after use, rinse instruments under warm or cool running water to remove all blood, body fluids and tissue. Dried soils may damage the instrument surface and make cleaning difficult.
CAUTION: Do not use hot water since this causes proteinous substances to coagulate. - Before you begin, fill the ultrasonic cleaner with deionized water and enzymatic cleaner like Enzol according to the manufacturer’s recommendations. You may also use a neutral pH or mild alkaline detergent like Alconox.
- Run the cleaner...more
- Immediately after use, rinse instruments under warm or cool running water to remove all blood, body fluids and tissue. Dried soils may damage the instrument surface and make cleaning difficult.
- - February 14, 2022
After a good cleaning and disinfection, your surgical instruments may be sterilized using a variety of methods. The chart below shows two common methods, autoclaving and cold sterilization. Sterilization destroys all microbial life. Some chemical sterilants can be used as high level disinfectants (HLD) when used for shorter exposure periods.
- You can sterilize your instruments by soaking them in a chemical sterilant like Cidex Plus® for 10 hours at 25°C. This process may be detrimental to fine instruments.
- Dry heat or autoclaving are the preferred methods of sterilizing surgical instruments. Typically, surgical instruments are sterilized by autoclaving. Autoclaving, which is saturated steam under high pressure, is the most common method for sterilizing surgical instruments. If you prefer to autoclave, instruments may be autoclaved individually or in sets.
Disposable paper or plastic pouches are ideal for autoclaving individual instruments. Use a pouch wide enough for instruments with...more
- - February 13, 2022
Although stainless steel is corrosion-resistant, it can still rust and stain if it is handled improperly. To determine if a discoloration is rust or just a stain, erase the discoloration with a pencil eraser. If there is pitting in the metal under the discoloration, it is corrosion. If the discoloration is removed, it was just a stain.
- A High pH can cause a brown or orange stain on surgical instruments.
- If a stain is dark brown, the stainless steel surgical instruments have likely been exposed to a Low pH solution.
- A blue or bluish-black stain could be the result of reverse plating. This can happen if you mix metals in a cleaning cycle. For example, stainless steel instruments should not be mixed with titanium instruments. Do not place dissimilar metals (stainless steel, copper, chrome-plated, titanium, etc.) in the same cleaning cycle.
- A stain of multi-colors is caused by excessive heat.
- Light or dark spots on instruments are often caused by water droplets that dry on the surface of...more
- - February 09, 2022
Surgical instruments are designed to perform diagnostic, therapeutic, or investigative operations having specific functions such as to cut or incise, retract, grasp, hold or occlude, dilate or probe, suture or ligate.
The majority of surgical instruments are made of stainless steel or titanium (used where non-magnetic instruments are required). Stainless steel is an alloy that contains a minimum 12% chromium for corrosion resistance. Here's a quick comparison chart looking a various metals used in surgical instruments and the best applications for each.
Stainless Steel
Austenitic 316 steel, also called surgical steel or marine grade steel is the most common alloy used for WPI's standard line of instruments. Surgical steel has excellent corrosion-resistance, which makes it a good choice for biomedical implants or body piercing jewelery, as well as surgical instruments. It is in compliance with ASTM F138. Stainless steel (Inox) also has good salt resistance and temperature resistant up...more
- - January 16, 2022
The DMF1000 is a microprocessor-controlled microforge designed for fabrication of both small patch clamp glass pipettes and larger injection pipettes. The DMF1000 can be used for polishing patch clamp pipettes, microforging holding pipettes, microforging beveled injection pipettes, and for calibrating pipette tips for microinjection. Here we will show you how to install the microforge filament on your microscope.
- After you turn on the power to the microscope, you must choose the desired filament.
- The small filament MF200-H4 is better suited for microforging pipettes 1 µm or less.
- The large filament DMF1000-H5 should be used for larger pipette forging, forming and sizing.
- Mount and connect the heating filament. Push the filament into the clamp about halfway, with the filament under the objective clamp. You can adjust the position of the filament vertically and laterally in relation to the objective.
- Lower the stage all the way and mount the filament holder on the objective. Slide...more
- After you turn on the power to the microscope, you must choose the desired filament.

Recent Posts