Page 10 - Product Information
- - April 17, 2022
The ATC 2000 is a low noise heating system for maintaining animal body temperature during experimental procedures. Here are five reasons to choose the WPI Animal Temperature Controller. WPI's Adaptive control is unique in the industry, giving you precision control without the need for complex programming when it counts. Simple to setup. Stable control. No local hotspots.
1. ELECTRICALLY QUIET:
The DC heater is extremely quiet in terms of electromagnetic radiation. This is essential in electrophysiological recordings which are very sensitive to electromagnetic interference.
2. PRECISE & STABLE CONTROL:The controller uses proportional, integral, and differential (PID) technology in adjusting the DC voltage output. Compared with switched on/off type controllers, PID controllers provide a much more precise and stable control of temperature. The PID approach is also more immune to the variation of the experimental conditions such as change in animal size and unexpected disturbances...more
- - March 14, 2022
In this video, you get some practical tips on sterilizing your surgical instruments and using an autoclave. This video is the fourth in a series of four to discuss some best practices in caring for your surgical instrument investment.
Autoclaving, which is saturated steam under high pressure, is the most common method for sterilizing surgical instruments, but a cold sterilization method may also be used.
Prior to sterilization, clean the instruments and lubricate all hinged instruments with a surgical instrument lubricant. *Do not use WD-40, oil or other industrial lubricants.*
Cold Sterilization
Cold sterilization involves soaking instruments in a cold sterilant like Cidex® for at least 10 hours. This process may be detrimental to fine instruments.
If disinfection is all that is required (and not sterilization) a 10–90 minute soak in Cidex® may be all that is necessary.
When using instruments with tungsten carbide inserts, avoid using solutions with benzyl ammonium chloride
...more
- - March 09, 2022
In this video, you can see how to mechanically clean surgical instruments using an ultrasonic cleaner. This video is loaded with tips. This video is the third in a series of four to discuss some best practices in caring for your surgical instrument investment.
Ultrasonic is the most effective cleaning method, because of its cavitation. Vibrating sound waves create micron-size bubbles in solution that grow as the pressure in the unit changes. Eventually the bubbles implode. The bursting bubbles effectively dislodge debris, even in the most difficult to reach places. Use of ultrasonic detergent greatly improves the effectiveness of the cleaner, because it increases the number of tiny bubbles.
Rinsing Instruments
Immediately after use, rinse instruments under warm or cool running water to remove all blood, body fluids and tissue. Dried soils may damage the instrument surface and make cleaning difficult. Do not use hot water since this causes proteinous substances to coagulate.
Process...more
- - March 07, 2022
In this video, you can see how to manually clean surgical instruments. It is loaded with tips. This video is the second in a series of four to discuss some best practices in caring for your surgical instrument investment.
If instruments are easily damaged, complex and requiring disassembly, or have small lumens, they may need to be cleaned manually.
Personal Protective Equipment
When cleaning your instruments manually, wear heavy-duty rubber gloves, a plastic apron, eye protection and a mask.
Cleaning Materials
Remember, use stiff plastic cleaning brushes. Do not use steel wool or wire brushes.
Use only neutral pH detergents. If the instruments are not rinsed properly, low pH detergents may breakdown the stainless protective surface and cause black staining.
High pH detergents may cause surface deposits of brown stains, which can interfere with the smooth operation of the instrument.
Process
- Brush delicate instruments carefully and handle them separately from general instruments...more
- - March 03, 2022
What's the difference between cleaning, disinfecting and sterilizing? Let's take a look. This is the first in a series of four videos to discuss some best practices in caring for your surgical instrument investment.
Surgical instruments are crucial in your research, and proper cleaning, handling and storage will ensure your instruments last for many years to come.
First of all, before we begin, let me remind you not to use alcohol for cleaning. It is not a good cleaning agent, and because of its rapid evaporation, it cannot sterilize instruments. Now, in this series of videos, we will talk about the three levels of surgical instrument care -- cleaning, disinfecting and sterilizing.
Cleaning
Cleaning removes dirt, debris and biological material from surgical instruments. To maximize the useable life of your instruments, never allow blood to dry on surgical instruments. Within 10-20 minutes after a procedure, open all the instruments and begin a decontamination process.
To prevent blood...more - - February 22, 2022
Adjustable Height/Working Distance
WPI's 3D SpectaSCOPE™ Inspection Scope is a true 3D digital stereo optical scope with a host of innovative patent-pending features.
It all starts with the fully optical zoom system, which is sending the smallest details to its two powerful HD 5MP cameras. The images are then transmitted at full speed frame rates to the on-board HD screens, giving you a true three-dimensional image. You choose the most comfortable position for the viewer’s tilting headset.
The 3D SpectaSCOPE™ is easy to set up. Here we show you how to adjust the height and working distance of the 3D SpectaSCOPE™.
Step 1. Use the adjustment knob to move the manual focus to the middle of the range.
Step 2. While supporting the arm, loosen the tension adjustment knob/handle to move the head up or down.
Step 3. Using a ruler, adjust the scope head so it is 200mm from the top of the subject you wish to view.
Step 4. Tighten the tension adjustment knob/handle.
Step 5. Looking...more
- - February 21, 2022
WPI’s 3D SpectaSCOPE™ Inspection Scope is a revolutionary advancement for detailed visual inspection with a host of patent-pending features, including:
- A self-zooming scope and ergonomically designed head to offer you faster inspections, less fatigue and greater accuracy.
Self-focus that employs sophisticated computer algorithms and a large depth of field so your subject remains in focus (even when the working distance changes).
- A self-zooming scope and ergonomically designed head to offer you faster inspections, less fatigue and greater accuracy.
- - February 14, 2022
Ultrasonic cleaning is the most effective cleaning method for maintaining your surgical instruments, because of its cavitation. Vibrating sound waves create micron-size bubbles in solution that grow as the pressure in the unit changes. Eventually the bubbles implode. The bursting bubbles effectively dislodge debris, even in the most difficult to reach places. Use of ultrasonic detergent greatly improves the effectiveness of the cleaner, because it increases the number of tiny bubbles
- Immediately after use, rinse instruments under warm or cool running water to remove all blood, body fluids and tissue. Dried soils may damage the instrument surface and make cleaning difficult.
CAUTION: Do not use hot water since this causes proteinous substances to coagulate. - Before you begin, fill the ultrasonic cleaner with deionized water and enzymatic cleaner like Enzol according to the manufacturer’s recommendations. You may also use a neutral pH or mild alkaline detergent like Alconox.
- Run the cleaner...more
- Immediately after use, rinse instruments under warm or cool running water to remove all blood, body fluids and tissue. Dried soils may damage the instrument surface and make cleaning difficult.
- - February 14, 2022
After a good cleaning and disinfection, your surgical instruments may be sterilized using a variety of methods. The chart below shows two common methods, autoclaving and cold sterilization. Sterilization destroys all microbial life. Some chemical sterilants can be used as high level disinfectants (HLD) when used for shorter exposure periods.
- You can sterilize your instruments by soaking them in a chemical sterilant like Cidex Plus® for 10 hours at 25°C. This process may be detrimental to fine instruments.
- Dry heat or autoclaving are the preferred methods of sterilizing surgical instruments. Typically, surgical instruments are sterilized by autoclaving. Autoclaving, which is saturated steam under high pressure, is the most common method for sterilizing surgical instruments. If you prefer to autoclave, instruments may be autoclaved individually or in sets.
Disposable paper or plastic pouches are ideal for autoclaving individual instruments. Use a pouch wide enough for instruments with...more
- - February 13, 2022
Although stainless steel is corrosion-resistant, it can still rust and stain if it is handled improperly. To determine if a discoloration is rust or just a stain, erase the discoloration with a pencil eraser. If there is pitting in the metal under the discoloration, it is corrosion. If the discoloration is removed, it was just a stain.
- A High pH can cause a brown or orange stain on surgical instruments.
- If a stain is dark brown, the stainless steel surgical instruments have likely been exposed to a Low pH solution.
- A blue or bluish-black stain could be the result of reverse plating. This can happen if you mix metals in a cleaning cycle. For example, stainless steel instruments should not be mixed with titanium instruments. Do not place dissimilar metals (stainless steel, copper, chrome-plated, titanium, etc.) in the same cleaning cycle.
- A stain of multi-colors is caused by excessive heat.
- Light or dark spots on instruments are often caused by water droplets that dry on the surface of...more
- - February 03, 2022
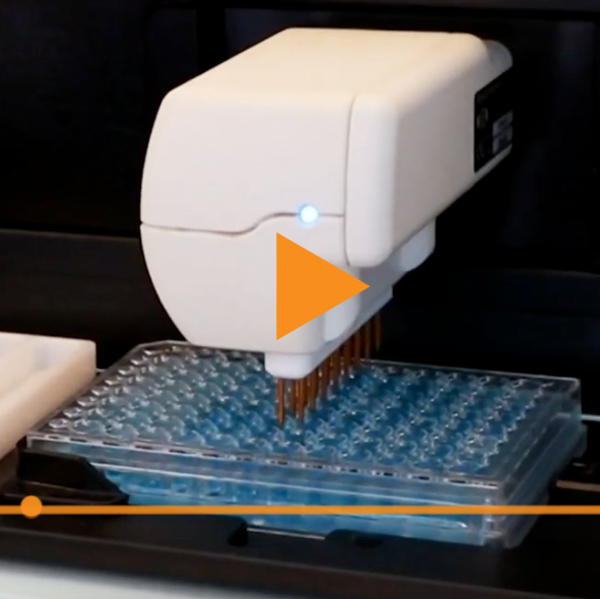
Overview of the MICRO-ePUMP
Designed to simplify intracellular injection and a variety of other microinjection tasks, the MICRO-ePUMP uses carefully regulated air pressure for injecting cells with fluid. Injected volumes range from picoliters to nanoliters. Timing, injection pressure and compensation pressure are adjusted independently using the touch screen interface. Time intervals can range from 2 seconds down to 10 ms or less, depending on the injection pressure setting. The injection pressure interval is triggered using the foot switch.
The MICRO-ePUMP is designed to inject very small quantities of fluids, such as drugs, into cells or small organelles. Two different positive pressures may be applied with a precision timing circuit that switches between the two pressure automatically.
- The port supplies positive pressure for high-pressure ejection.
- The pressure port maintains a low positive “compensation” pressure to the injecting pipette between injection pulses to prevent fluid uptake...more
- - September 26, 2021
The manual microsyringe pump is a convenient tool for precise manual injection of fluid using glass pipettes or similar injection devices. The design allows visual feedback of flow at the pipette tip. They can also be used as a manual micro syringe pump for perfusion or withdrawal of liquids. The resolution of the injection volume can be continuously varied from 10 nanoliters to the microliter range, depending on the syringe used. Here we show you how to setup your system.
- Loosen the set screw on the Adjustable Micrometer Mount, but do not remove it.
- Tighten the thumb screw on the Ajdustable Micrometer Mount.
- Insert the digital micrometer or the manual micrometer through the hole on the Adjustable Micrometer Mount. Then, tighen the set screw.
- Loosen the set screw on the Syringe Piston Mount Bracket.
- Install the Bracket on the Spindle of the Micrometer. Tighten the set screw on the Bracket
- Loosen the Syringe Piston Mount Bracket thumb screw and the Syringe Mount Bracket thumb...more
- - July 22, 2021
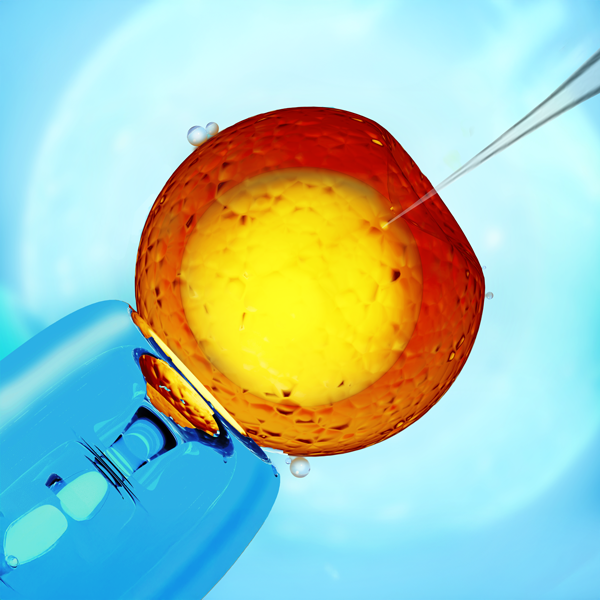
Do you want to take the next step in your CRISPR-CAS9 projects, making the injection of biomolecules in your cell lines more efficient? You can now increase the viability of injected embryos with WPI’s MICRO-ePORE, which offers improved repeatability and functionality for pinpoint cell penetration for targeted microinjections in transgenesis.
Improve Embryo Survival with Pinpoint Cell Penetration
Principle of MICRO-ePORE™ Technology
- Classic Microinjection of biomolecules with capillaries causes permanent damage to the cell membrane, and the chance of lysis is high.
- Electroporation is a shot-gun, random approach that cause lots of membrane holes in cells, also increasing the chance of lysis.
- The MICRO-ePORE uses a very localized rearrangement of the charged double lipid membrane, allowing the biomolecules solution to get into the cells during injection. This leaves the rest of the membrane intact, reducing lysis and improving cell survival.
MICRO-ePORE in the Field
The MICRO-ePORE...more
- - June 20, 2021
WPI offers alkaline cleaners for the pharmaceutical, biotech, medical device, healthcare, precision engineering, and other sectors.

Recent Posts