Page 3 - TechTalk Videos
- - January 16, 2022
The DMF1000 is a microprocessor-controlled microforge designed for fabrication of both small patch clamp glass pipettes and larger injection pipettes. The DMF1000 can be used for polishing patch clamp pipettes, microforging holding pipettes, microforging beveled injection pipettes, and for calibrating pipette tips for microinjection. Here we will show you how to configure the DMF1000 controller.
- Power up the DMF1000 unit. Connect the cord to the power input jack.
- Turn the power switch on. Then, plug the filament pins into the rear panel of the controller and plug the filaments into the sockets.
- After initialization, the setting that had been stored in memory location 0 displays. The Heat and Timer displays illuminate, indicating that the unit is powered up. The first time the unit is turned on, both readouts display 000. The TIME selection is set to Auto. The MODE selection is Heat. The Air On light is off, and the Heat On light is off.
- For demonstration, I will hold the filament...more
- - September 26, 2021
Inox, Titanium, Dumoxel®, Dumastar®, Antimagnetic... Have you ever looked at the variety of metal alloys for surgical instruments and laboratory tools and wondered which is best for your needs? Here's a brief rundown.
Hardness (Rockwell) Max. Temp. Resistance Max. Temp. Resistance Magnetic Stainless Steel & Inox 55-56 350°C Good Yes Dumoxel 36 350°C Excellent No Dumostar 62 550°C 100% Non-corrosive No Titanium 37 550°C 100% Non-corrosive No Stainless Steel (Inox)
Why Stainless Steel is the Standard Alloy for Surgical Instruments
Our standard line of instruments is manufactured of highest quality materials. They are made of austenitic 316 steel commonly known as “surgical steel” or “marine grade steel.” Stainless steel, also known as Inox (from the French word "inoxydable"), is highly corrosion resistant and it is a common choice of material for biomedical implants or body piercing jewelry. It is in compliance with ASTM F138. This WPI line is an excellent alternative to German surgical...more
- - September 26, 2021
The manual microsyringe pump is a convenient tool for precise manual injection of fluid using glass pipettes or similar injection devices. The design allows visual feedback of flow at the pipette tip. They can also be used as a manual micro syringe pump for perfusion or withdrawal of liquids. The resolution of the injection volume can be continuously varied from 10 nanoliters to the microliter range, depending on the syringe used. Here we show you how to setup your system.
- Loosen the set screw on the Adjustable Micrometer Mount, but do not remove it.
- Tighten the thumb screw on the Ajdustable Micrometer Mount.
- Insert the digital micrometer or the manual micrometer through the hole on the Adjustable Micrometer Mount. Then, tighen the set screw.
- Loosen the set screw on the Syringe Piston Mount Bracket.
- Install the Bracket on the Spindle of the Micrometer. Tighten the set screw on the Bracket
- Loosen the Syringe Piston Mount Bracket thumb screw and the Syringe Mount Bracket thumb...more
- - July 22, 2021
Do you want to take the next step in your CRISPR-CAS9 projects, making the injection of biomolecules in your cell lines more efficient? You can now increase the viability of injected embryos with WPI’s MICRO-ePORE, which offers improved repeatability and functionality for pinpoint cell penetration for targeted microinjections in transgenesis.
Improve Embryo Survival with Pinpoint Cell Penetration
Principle of MICRO-ePORE™ Technology
- Classic Microinjection of biomolecules with capillaries causes permanent damage to the cell membrane, and the chance of lysis is high.
- Electroporation is a shot-gun, random approach that cause lots of membrane holes in cells, also increasing the chance of lysis.
- The MICRO-ePORE uses a very localized rearrangement of the charged double lipid membrane, allowing the biomolecules solution to get into the cells during injection. This leaves the rest of the membrane intact, reducing lysis and improving cell survival.
MICRO-ePORE in the Field
The MICRO-ePORE...more
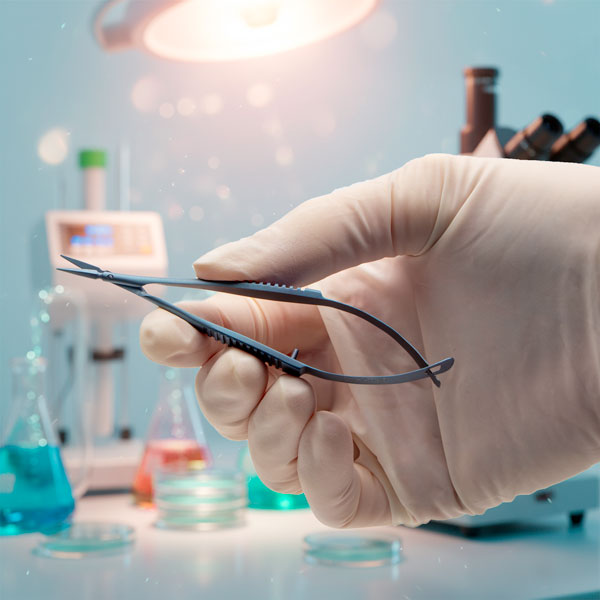
- - June 28, 2021
Scissors are cutting instrument with two blades joined together at a pivot point so that the sharp edges glide against each other to shear material that is between the blades. Micro scissors are often called Vannas or spring scissors. Fine tip scissors (like these Vannas) are ideal for use in very restricted spaces. Here we examine some of our popular Vannas scissors.
Ambidextrous Use
Vannas scissors are perfect for right- or left-hand use, and are designed for ophthalmological procedures and neurosurgical application, which require a delicate incision of tissue.
Less Tissue Trauma
You can make quick, accurate cuts with minimal tissue damage, because these fine scissor blades are sharp. Vannas scissors work well under a dissection microscope.
Curved or Straight Tips
Curve-tipped scissors are a good choice when you want to avoid cutting underlying tissues. Curved blades provide a better visual of the working area. Straight blades may be used for any type of incision.
The blade tips...more
- - May 26, 2021
This video shows how to setup the heavy boom microscope stand (502004), which can be used with a PZMIII or PZMIV microscope head. The PZMIII and PZMIV require the 502009 76mm focus mount. The setup of the 505606 heavy boom stand is identical. The 505606 uses the 505610 focus mount that is designed for use with the Enhanced Reality Macroscope. The focus mounts are sold separately.
Stand Components
These are the pieces of the boom stand.
(1) Heavy Base
(1) Vertical Post
(1) Guard Ring
(1) Horizontal Bar
(1) Cross Block
(1) Anchoring Screw with Locking Washer
(1) Hex Key
(1) Clutch Handle
(3) Adjustment Knobs
(1) Boom Locking Screw
(1) Post Cap
Set Up the Stand
- Set the heavy base up on one edge. This may require two people, because the base is heavy. Have one person position the vertical post in the recessed circle in the center of the top side of the base. The post will be perpendicular to the base. Let a second person place the locking washer on the anchoring screw and insert it into...more
- - May 26, 2021
This video shows how to setup the articulating arm clamp stand for a microscope (502007), which can be used with a PZMIII microscope head. The PZMIII requires the 502009 76mm focus mount. The setup of the 505607 articulating arm stand is identical. The 505607 uses the 505610 focus mount that is designed for use with the Enhanced Reality Macroscope. The focus mounts are sold separately.
Stand Components
These are the pieces of the stand.
(1) Table clamp base
(1) Middle horizontal bar
(1) Adjustable forearm
(2) Clutch handles
(2) Adjustment screws
(2) Ring washers (white)
Set Up the Stand
- Loosen the two screws on the table clamp by rotating them counter-clockwise. Position the clamp so that it wraps around the edge of the table with the screws located under the table. Tighten the screws by rotating them clockwise to securely mount the stand on the table.
- Place a white ring washer on top of the table clamp and line it up with the hole. Then, insert the post of the middle horizontal...more
- - May 26, 2021
This video shows how to setup the post stand for a microscope (502007), which can be used with a PZMIII microscope head. The PZMIII or PZMIV require the 504947 76mm focus mount. The setup of the 505608 post stand is identical. The 505608 uses the 505609 focus mount that is designed for use with the Enhanced Reality Macroscope. The focus mounts are sold separately.
Stand Components
These are the pieces of the stand.
(1) Base
(1) Vertical Post
(1) Vertical Post Extension
(1) Guard Ring Support
(1) Reversible Plate
(1) Clutch Handle
(1) Post Cap
(1) Focus Mount
504947 Focus Mount included with the 503102 stand, or
505609 Focus Mount included with the 505608 stand
(1) Instruction Manual
Set Up the Stand
- Set the base flat on a solid table or work surface. Screw the threaded end of the vertical post into the black support block on the base. Use a hex key to tighten the screw in the side of the black support block to secure the vertical.
- Screw the post extension into the top of the vertical...more
- - April 26, 2021
The PUL-1000 is a microprocessor controlled, four-stage, horizontal puller for making glass micropipettes or microelectrodes. Here is how to run a program that will pull two identical microelectrodes.
Loading a Program
We will use the keypad to navigate through the display.
- Use the arrows to navigate to LOAD (00). The top and bottom arrows on the keypad navigate numbers in increments of 1. The left and right arrows on the keypad navigate numbers in increments of 10. Press ENTER. The number will start blinking.
- Use the arrows to navigate to the program number you would like load. Once you reach the desired program, press ENTER to run the program and pull your glass.
Creating a New Program
- Use the arrows to navigate to STEP 1 - HEAT. Press ENTER. The number will start blinking.
- Use the arrows to set the desired value for the heat. Press ENTER.
- Navigate to STEP 1 – FORCE. Press ENTER. The number will start blinking.
- Use the arrows to set the desired value of force. Press ENTER.
- Navigate...more
- - April 22, 2021
Let’s look at a Peri-Star Pro peristaltic pump, which is available in four models for high and low flow rate, and 2, 4 and 8 channels. Here’s a quick introduction to the pump.
Control Keypad
Setup and operation are controlled with a Control Knob and three membrane keys. Pressing a membrane key once activates the key function.
- The Run/Stop button switches the pump on or off. If the pump is running, pressing this key immediately stops pump. If the pump is off, pressing the key turns it on.
- The Rotation Direction button sets the rotor direction clockwise or counterclockwise. The direction is shown on LCD display.
- The Full Speed button runs the pump at maximum flow rate. This is convenient to use when evacuating or cleaning the system.
Control Knob
The Control Knob provides two functions by rotating or pressing. Rotate the knob clockwise to increase the pump’s flow rate or counterclockwise to decrease the pump’s flow rate. Slow rotation makes a small change in the flow rate. Fast rotation...more
- - April 22, 2021
The Peri-Star Pro is a popular peristaltic pump. Here we see how to calibrate the pump so that the display shows the dispensed volume accurately.
In addition to the traditional RPM control, Peri-Star Pro also allows control of pump output by setting a calibrated flow rate. Flow rate is affected by tubing ID, tubing material, and rotor speed. Peri-Star Pro stores the flow rate relation of silicone tubing and rotor speed so that you can easily switch between controls for flow rate or RPM (revolutions per minute). Calibration is required for high precision pumping or after changing to a different type of tubing.
One of the important and unique features of Peri-Star Pro is that the control of liquid flow can be expressed either as the rotation rate of the pump head (rotation per minute, or RPM) or directly as the flow rate in milliliters per minute (mL/min.) or milliliter per hour (mL/hr). This feature makes reporting and repeating the experiment much easier. In the flow rate mode, you only...more
- - April 22, 2021
The PUL-1000 is a microprocessor controlled, four-stage, horizontal puller for making glass micropipettes or microelectrodes. Here is a quick overview to get you started quickly.
Quick Start Setup
- Plug the power cord into the wall outlet. An LED light on the power supply illuminated when the unit is connected to power.
- Plug the power cord into the rear panel of the PUL-1000. Then, the power switch on the side panel illuminates.
- Press the Power button to turn on the display.
- To open the glass capillary clamps, place your thumb under the clamp and depress the release button with your index finger. This allows the carriages to move freely.
- Push the carriages together toward the center.
- Install the silicone glass capillary clamp pads matching the outer diameter (OD) of the glass capillary, by sliding them into the clamp pad spots on the clamps.
- Mount the glass capillary onto the carriage and secure it with the glass clamps.
- On the LCD display, choose the correct sequence. If you do not...more
- - April 21, 2021
The PUL-1000 is a microprocessor controlled, four-stage, horizontal puller for making glass micropipettes or microelectrodes. Here we will see how to load a piece of glass into the carriage.
The glass capillary is held by clamps mounted on two movable carriages. Both carriages synchronously slide as a program is executed.
- Manually slide the carriages together when you are loading the glass.
- To open the clamps, place your thumb under the clamp and depress the release button with your index finger.
- Slide the glass capillary into the groove from one side. Slide it through the center of heating filament onto the other side. If you want two equivalent length micropipettes, be sure to center the glass in the filament.
- Secure the glass capillary with the clamps.
That’s it. Now you’re ready to load a program. If you have any questions, just give us a call.
- - April 21, 2021
The PUL-1000 is a microprocessor controlled, four-stage, horizontal puller for making glass micropipettes or microelectrodes. Here are the resolutions for some common issues with the puller.
Puller Stops
If the puller stops in the middle of a pull and the unit beeps, one of two issues may be the culprit.
- The unit may be over heating. Allow the unit time to cool down before attempting to pull more glass.
- If a program fails in the middle of a pull, you may have exceeded the parameters of the unit. For example, when you add up the distance of travel for all the stages, you may have exceeded the maximum range of travel. Check your program. You may need to alter the heating or travel parameters to conform with the unit’s maximums.
Glass Doesn’t Pull Well
If the glass does not pull well, look at one of these possible causes.
- The parameter may not be set properly for the properties of the new glass. Run the Glass Softening Test to establish a new baseline heating parameter.
- The filament...more
- - April 21, 2021
The PUL-1000 is a microprocessor controlled, four-stage, horizontal puller for making glass micropipettes or microelectrodes. We will show you how to run a glass softening test.
You should run the Softening Test when:
- You change the filament
- Lot numbers or capillary types change
- You create or modify a program
- The ambient environment changes
- Press the STOP key to quit any running program. The following window displays.
- Mount a glass capillary on the carriage.
- Press the START key to run the Glass Capillary Softening Test. The heating power increases gradually. The heating stops when the glass begins to move.
- Record the heating power. This is the baseline heating value for the glass type tested. It is a good starting point for the first stage of your program.
If you have any questions, just give us a call.

Recent Posts